Watermark Inversion — Removing a Semi-Transparent Star
A geophysics-inspired approach to image watermark removal
Try and clean your image water-cleaner Project
Before / After
The inversion recovers the original background pixel-by-pixel — no healing brush, no blending, just math. The complex detail underneath (cherry blossoms, dragon scales, robes) is fully preserved:

The Problem
Many images carry a semi-transparent star watermark overlaid in the corner. This watermark presents a classic inverse problem: given an observed image corrupted by a known mark, recover the original background.
The watermark is semi-transparent and consistent across images, making it an ideal candidate for a physics-based inversion approach—the same techniques used in geophysics to invert seismic data or potential fields.
The Physics: Forward Model and Inversion
The watermark follows a simple blending model:
observed=mark_true×α+background×(1−α)
Where:
observed= the actual pixel value we see in the watermarked imagemark_true= the color of the watermark (near white, ~0.999)alpha= the opacity of the watermarkbackground= the original, un-watermarked pixel value (what we're solving for)
The Inverse Problem
By rearranging the forward model, we can solve for the unknown background:
background=1−αobserved−mark_true×α
This is the core of our inversion. In geophysics, we'd call this a "linear inverse problem" — given measurements (observed pixels) and a known forward operator (the blending equation), estimate the model (background image).
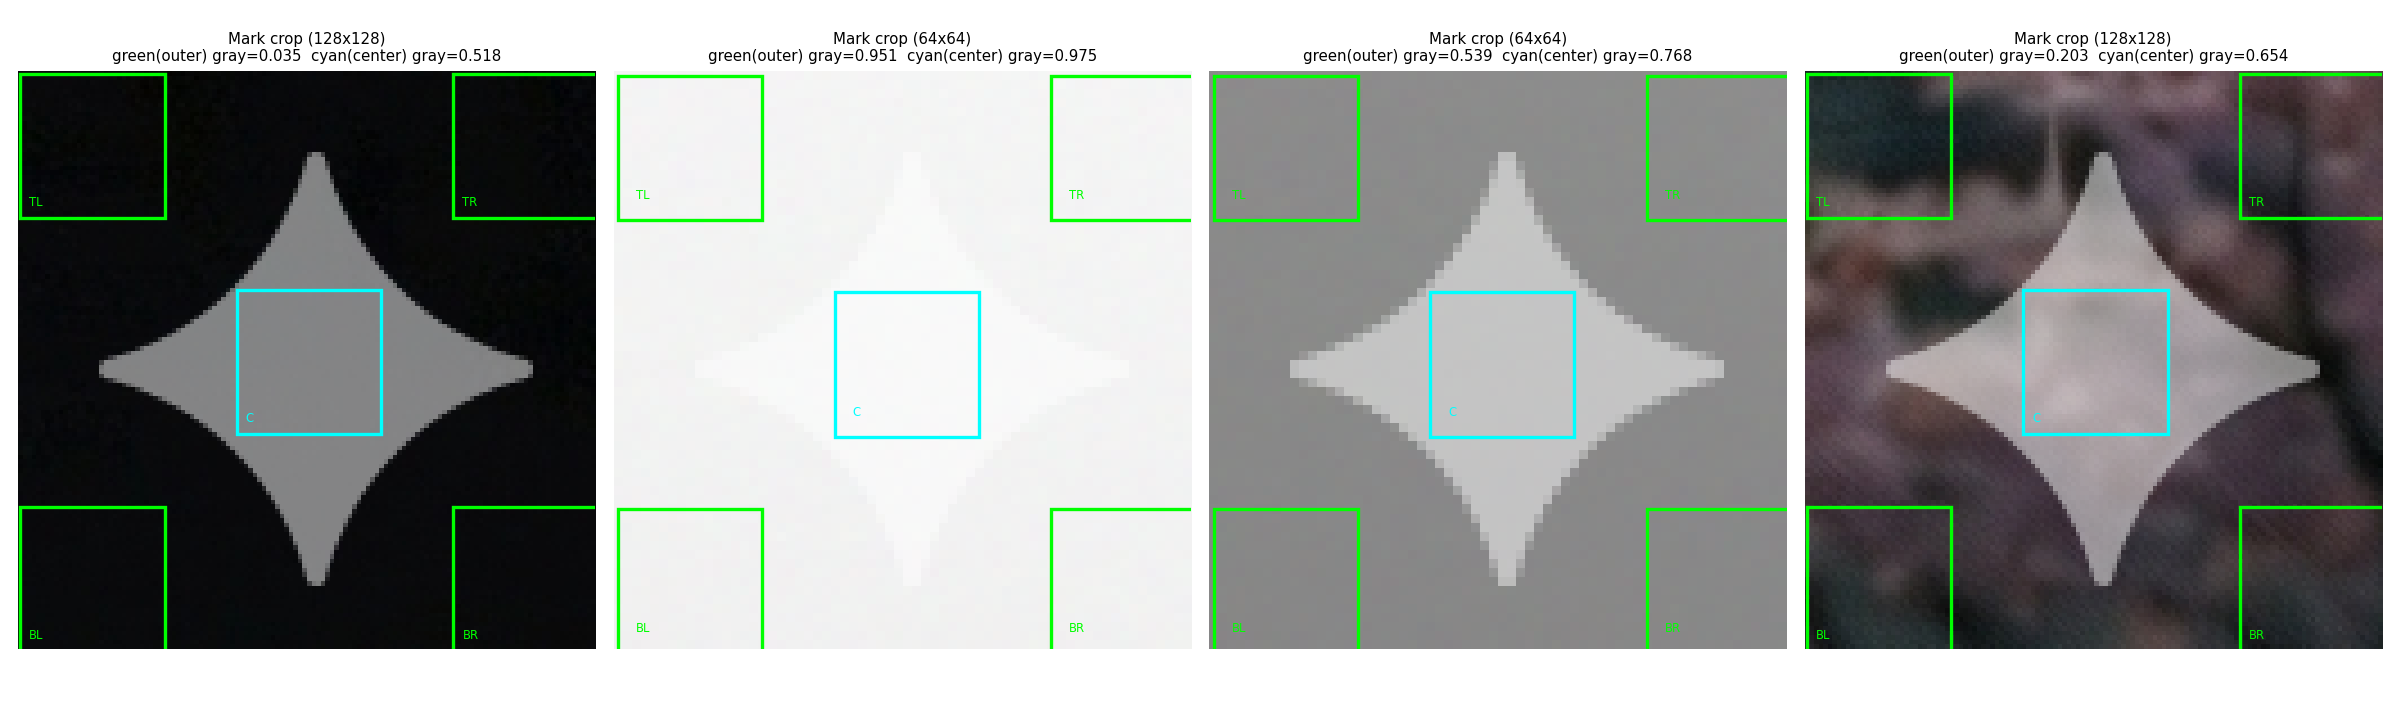
Sampling the Mark: Outer vs Center
The mark region is sampled at two zones — green corners (outer, background reference) and cyan center (mark-contaminated). The difference between them reveals the watermark's contribution:
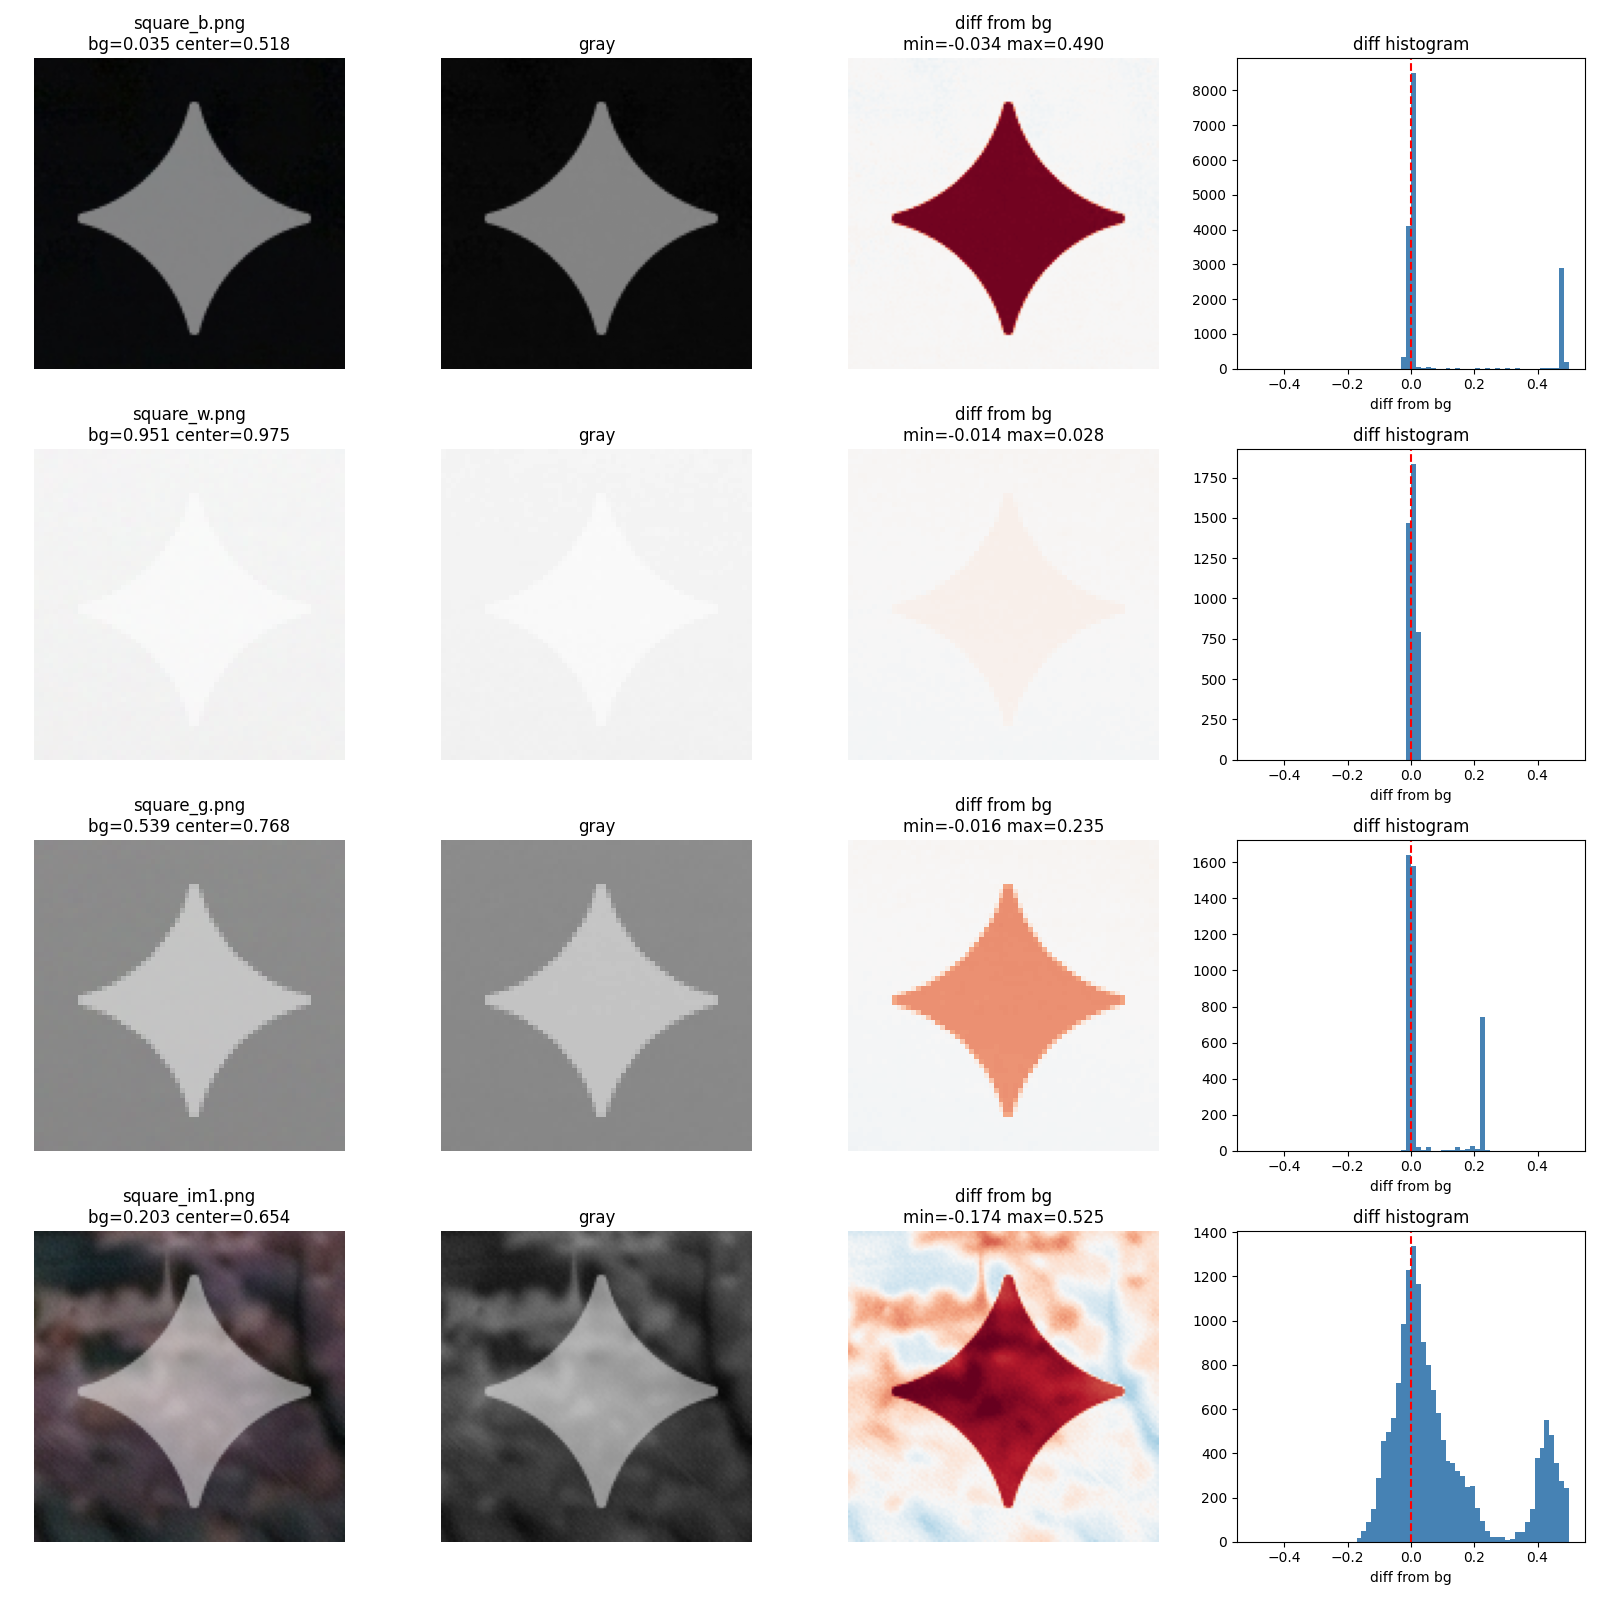
Calibration: Solving for α and mark_true
The watermark parameters were unknown and had to be solved from calibration data. Three uniform squares were photographed with and without the watermark:
- Black square (background ≈ 0): observed = 0.5 × mark_true × α
- White square (background ≈ 1): observed = mark_true × α + (1 - α)
- Gray square (background ≈ 0.5): observed = 0.5 × mark_true × α + 0.5 × (1 - α)
Setting up the system of equations for each color channel:
| Background | Black | White | Gray |
|---|---|---|---|
| Observed (no mark) | 0.000 | 1.000 | 0.500 |
| Observed (with mark) | 0.501 | 0.750 | 0.625 |
| Difference | 0.501 | -0.250 | 0.125 |
Solving this linear system yields:
- α = 0.5012 (watermark opacity: ~50%)
- mark_true = 0.9991 (watermark color: nearly pure white)
These calibration values are then fixed for all subsequent inversions.
Template Mask: The Star Shape
The watermark follows a consistent star pattern. A binary mask was extracted from calibration data, defining exactly where the mark is present:

Two template sizes are used:
- 128×128 mask for high-resolution images (max dimension ≥ 1440px)
- 64×64 mask for smaller images (max dimension < 1440px)
This allows the algorithm to scale gracefully across image sizes.
Results: Before and After
The inversion method successfully removes the star watermark from real photographs:
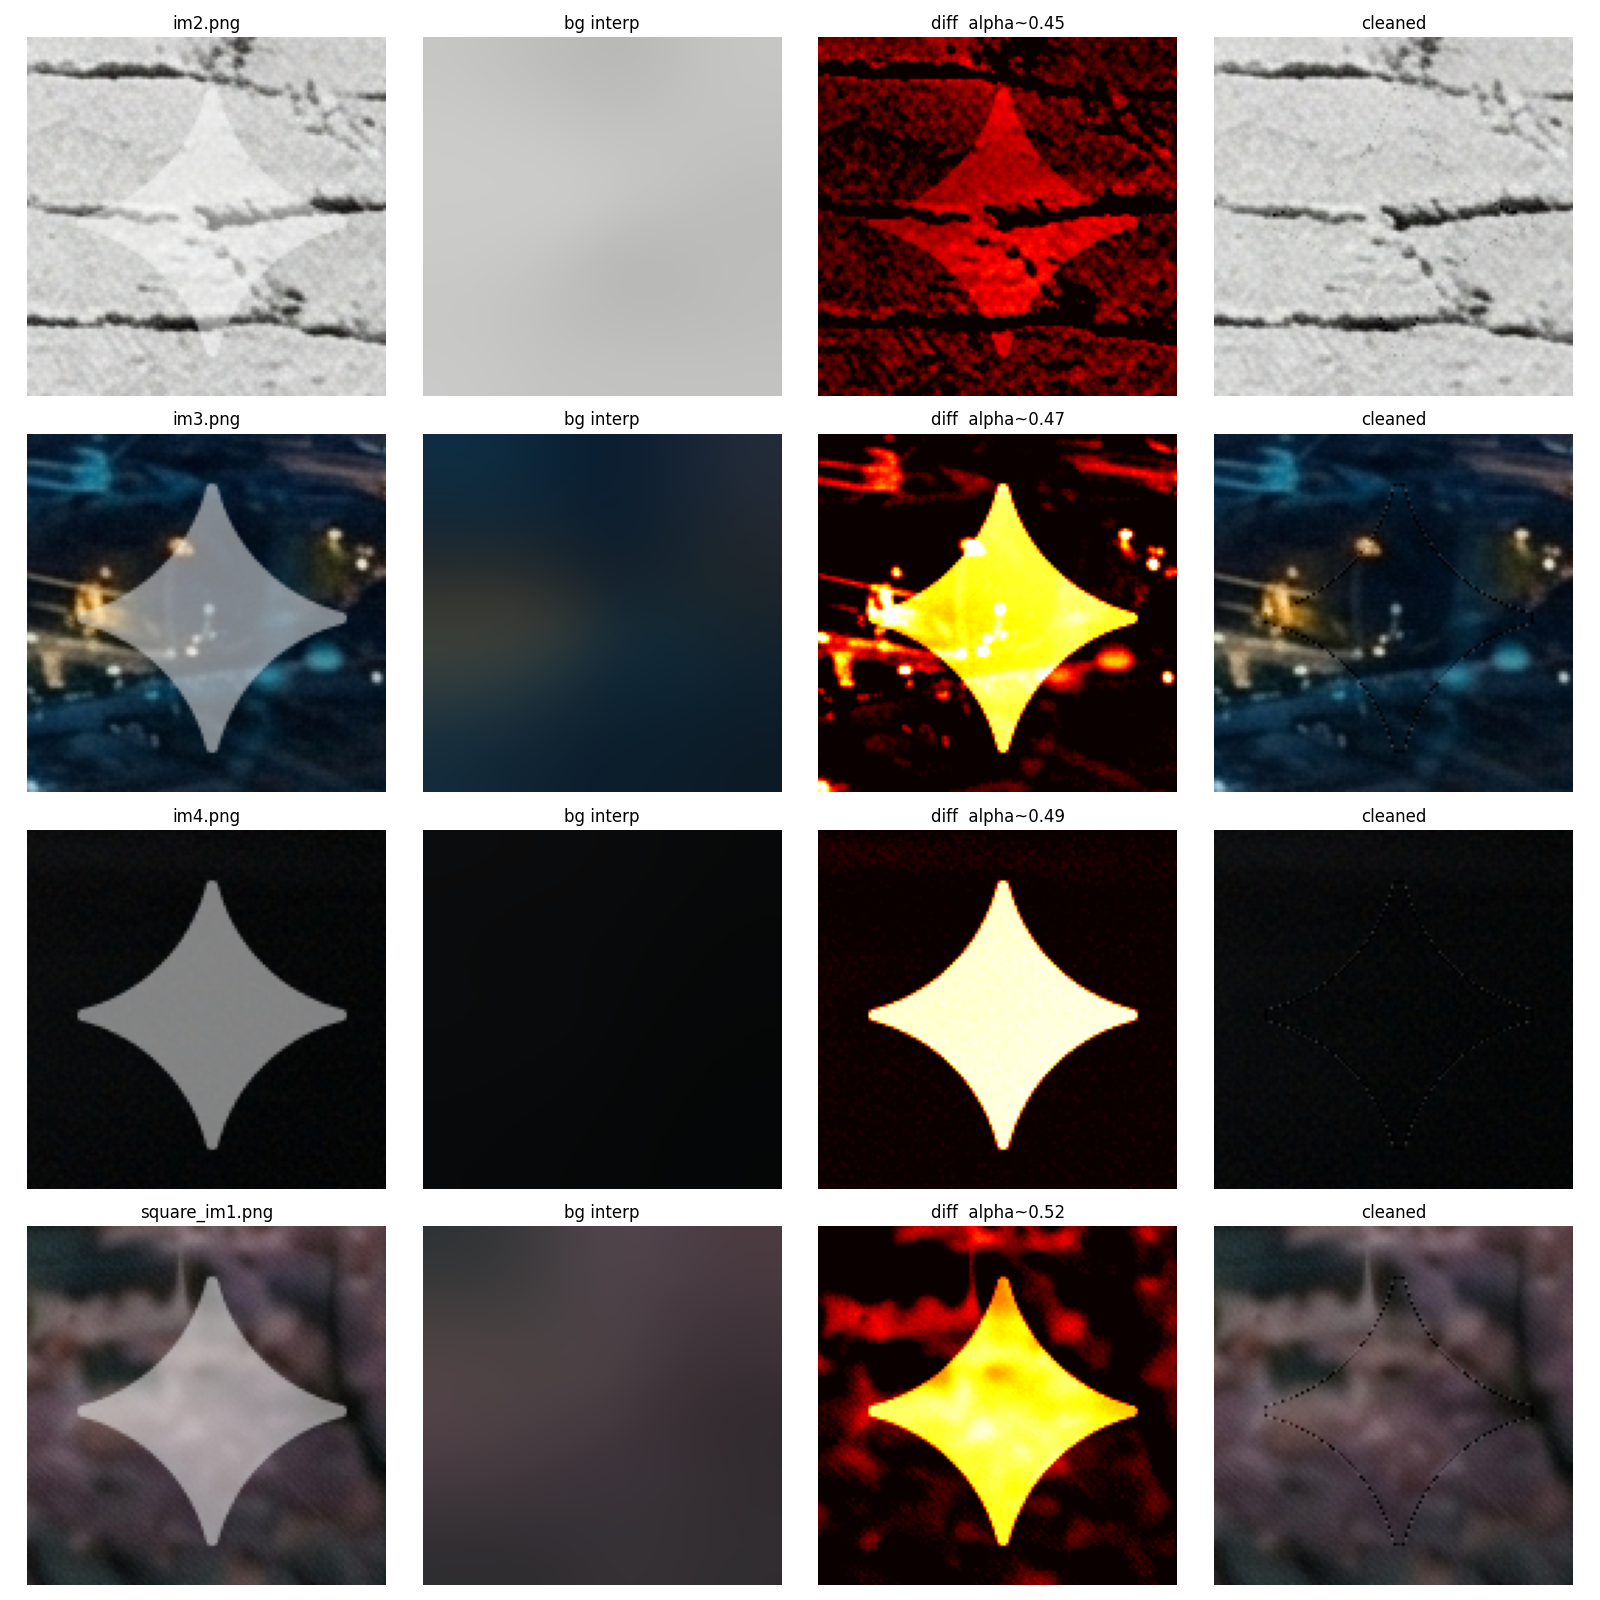
The background is recovered by applying the inverse formula only within the masked region, while leaving non-watermarked pixels untouched. A Gaussian blur (σ=20) is used to interpolate the background within the mask, providing a smooth foundation for reconstruction.
Edge Artifacts and the Aliasing Fix
At the boundary of the watermark mask, aliasing artifacts can occur due to semi-transparent or anti-aliased pixels. These are corrected using morphological filtering:
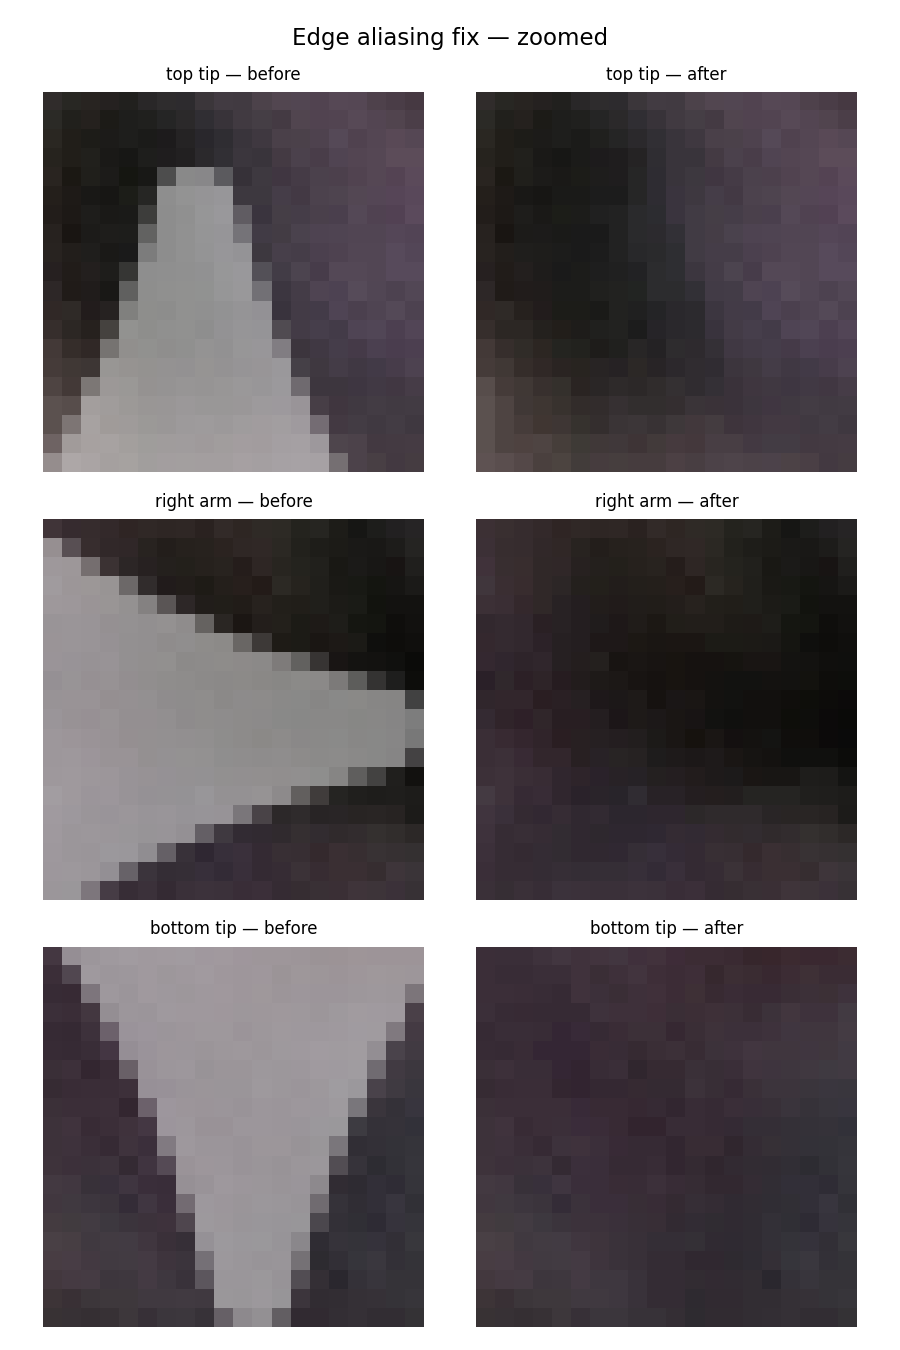
The algorithm:
- Computes the "edge" region as:
dilation(mask, 2) AND NOT erosion(mask, 2) - Applies a median filter (size 3) to smooth these edge pixels
- Blends the filtered values back into the result
This preserves sharp inversion within the mask while smoothing the boundary transition.
Core Algorithm: The remove_mark Function
def remove_mark(crop, mask):
    # Interpolate background within mask using Gaussian blur
    bg = interp_bg(crop, mask, sigma=20)
    result = crop[...,:3].astype(float).copy()

    # Apply inversion formula: background = (observed - mark_true * alpha) / (1 - alpha)
    for c in range(3):
        result[...,c] = np.where(mask,
            np.clip((crop[...,c] - MARK_TRUE * ALPHA) / (1 - ALPHA), 0, 1),
            crop[...,c])
    result = np.clip(result, 0, 1)

    # Fix edge aliasing artifacts
    edge = binary_dilation(mask, iterations=2) & ~binary_erosion(mask, iterations=2)
    for c in range(3):
        ch = result[...,c].copy()
        ch[edge] = median_filter(ch, size=3)[edge]
        result[...,c] = ch

    return result, bg
Key steps:
- Background interpolation (
interp_bg): Gaussian blur of non-masked pixels fills in the watermarked region with a reasonable background estimate - Inversion (main loop): Apply the linear inverse formula to recover background pixels
- Clipping: Ensure pixel values stay in [0, 1] range
- Edge smoothing: Median filter removes aliasing at mask boundaries